How to add payment into React Native using Stripe

Empowering Developers and Delighting Clients in Mobile Application Development, server-side Development and skillfully leveraging Google Cloud services for 4 Years and Counting!
In this tutorial we are going to implement a payment method in our React Native mobile app for iOS and Android. In this tutorial I will guide you through each step and at the end of this tutorial you will be able to do any real time payment using your mobile application. We will use React Native for mobile application development, NodeJs for server and mongodb for database and Stripe as a payment processing system. To host our APIs we will use heroku which provides free basic hosting and it will be enough to meet our requirements.
I will explain each and everything to you so let's dive into the tutorial.

We will start with creating react-native project and create UI which will be used in our application. As our main purpose is to learn payment implementation, so we will focus on it rather than wasting our time at building modern designed UIs. Let's create React Native project by following command.
- npx react-native init yourProjectName
- cd yourProjectName
- code .
by typing code . the folder will be opened in your editor. Now run the project on your device by following commands
npx react-native run-android
npx react-native run-ios
If you are new to react-native then you can follow this link for environment setup and creating new project https://reactnative.dev/docs/environment-setup
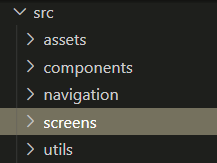
Now create a folder name src and create sub folder in with following names.
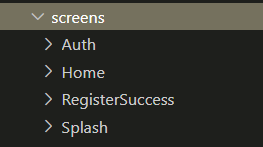
After this open screens folder and create sub folders in it as following
Don't worry if you have any issue by following this tutorial for code and files, I will share github link at the end of this tutorial. 😊 😊
Below is the list of packages I'm using in this project so you can install these packages by npm or yarn
- @react-navigation/native
- @react-navigation/native-stack
- @stripe/stripe-react-native
- formik
- lottie-ios
- lottie-react-native
- react-native-dotenv
- react-native-keyboard-aware-scrollview
- react-native-modal
- react-native-responsive-fontsize
- react-native-responsive-screen
- react-native-safe-area-context
- react-native-screens
- react-native-toast-message
- yup After installing these packages don't forget to run the project again by npx react-native run-android.😎😎. Now let's move towards the coding part for which you are waiting😏😏
Create a file Theme.js in the utils folder and paste the following code in it.
import {
  widthPercentageToDP as wp,
  heightPercentageToDP as hp,
} from 'react-native-responsive-screen'
import { RFValue } from 'react-native-responsive-fontsize'

export const Theme = {
  color: {
    primry: '#92056e',
    secondary: '#8abe01',
    tertiary: '#0087f0',
    helper: '#ffb600',
    error: '#f71114',
    text: '#555',
    white: '#fff',
    black: '#000',
    grey: '#808080',
  },
  font: {
    light: 'Barlow-Light',
    itlaic: 'Barlow-LightItalic',
    regular: 'Barlow-Regular',
    bold: 'Barlow-Bold',
    medium: 'Barlow-Medium',
  },
  hp,
  wp,
  rf: RFValue,
}
and save this file.
Create the following files in the components folder

Paste following code in the FNButton file
import React from 'react'
import { TouchableOpacity, Text } from 'react-native'

const FNButton = ({ style, label, labelStyle, onPress }) => {
  return (
    <TouchableOpacity
      style={style}
      activeOpacity={0.8}
      onPress={onPress}
    >
      <Text style={labelStyle}>{label}</Text>
    </TouchableOpacity>
  )
}

export default FNButton
Add following code toFNInput file
import React from 'react'
import { TextInput } from 'react-native'

const FNInput = ({
  value,
  onChangeText,
  style,
  keyboardType,
  placeholder,
  placeholderTextColor,
  secureTextEntry,
}) => {
  return (
    <TextInput
      placeholder={placeholder}
      placeholderTextColor={placeholderTextColor}
      value={value}
      onChangeText={onChangeText}
      style={style}
      keyboardType={keyboardType}
      underlineColorAndroid="transparent"
      secureTextEntry={secureTextEntry}
    />
  )
}

export default FNInput
If you are just getting bored for code section, you can move towards payment implementation part below and can find the code in the github repository.
In FNLoader file add the following code
import React from 'react'
import { View, Text, StyleSheet } from 'react-native'

import Modal from 'react-native-modal'
import LottieView from 'lottie-react-native'

import { Theme } from '../utils/Theme'

const FNLoader = ({ visible, label }) => {
  return (
    <Modal
      isVisible={visible}
      animationIn="bounceInRight"
      animationInTiming={1300}
    >
      <View style={styles.main}>
        <View style={styles.lottie}>
          <LottieView
            source={require('../assets/jsons/loading.json')}
            style={{ width: '100%', height: '100%' }}
            autoPlay
            loop
          />
        </View>
        <Text style={styles.label}>{label}</Text>
      </View>
    </Modal>
  )
}

const styles = StyleSheet.create({
  main: {
    flex: 1,
    backgroundColor: 'rgba(0,0,0,0.24)',
    alignItems: 'center',
    justifyContent: 'center',
  },
  lottie: {
    width: Theme.wp('30%'),
    height: Theme.wp('30%'),
    alignItems: 'center',
    justifyContent: 'center',
  },
  label: {
    color: Theme.color.secondary,
    fontSize: Theme.rf(20),
    fontFamily: Theme.font.light,
  },
})

export default FNLoader
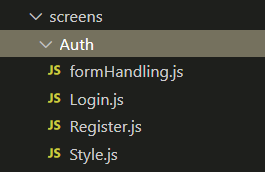
Congratulation🥳🥳. You have create all required components for the application and now let's move towards the creating screen part. Add following files inside src/screens/auth folder
Copy and paste below file into formHandling file
import { Formik } from 'formik'
import * as yup from 'yup'

export const registerForm = yup.object({
  FIRSTNAME: yup
    .string()
    .min(3, 'minimun 3 chracters required')
    .max(35, 'maximum 35 characters allowed')
    .required('first name is required'),
  LASTNAME: yup
    .string()
    .min(3, 'minimun 3 chracters required')
    .max(35, 'maximum 35 characters allowed')
    .required('last name is required'),
  EMAIL: yup
    .string()
    .email('Please enter a valid email')
    .min(5, 'minimun 5 chracters required')
    .max(255, 'maximum 255 characters allowed')
    .required('email is required'),
  PHONE: yup
    .string()
    .min(11, 'minimun 3 chracters required')
    .max(13, 'maximum 50 characters allowed')
    .required('phone number is required'),
  PASSWORD: yup
    .string()
    .min(8, 'minimun 8 chracters required')
    .max(255, 'maximum 255 characters allowed')
    .required('password is required'),
})

export const loginForm = yup.object({
  EMAIL: yup
    .string()
    .email('Please enter a valid email')
    .min(5, 'minimun 5 chracters required')
    .max(255, 'maximum 255 characters allowed')
    .required('email is required'),
  PASSWORD: yup
    .string()
    .min(8, 'minimun 8 chracters required')
    .max(255, 'maximum 255 characters allowed')
    .required('password is required'),
})
Add this code to style.js file
import { StyleSheet } from 'react-native'

import { Theme } from '../../utils/Theme'

const styles = StyleSheet.create({
  logoView: {
    width: Theme.wp('40%'),
    height: Theme.hp('15%'),
    marginTop: Theme.hp('5%'),
    marginBottom: Theme.hp('1%'),
    justifyContent: 'center',
    alignItems: 'center',
    alignSelf: 'center',
  },
  loginText: {
    fontSize: Theme.rf(24),
    fontFamily: Theme.font.bold,
    color: Theme.color.primry,
    textAlign: 'center',
  },
  desc: {
    fontSize: Theme.rf(14),
    fontFamily: Theme.font.regular,
    color: Theme.color.text,
    textAlign: 'center',
    marginVertical: Theme.hp('1%'),
  },
  body: {
    marginTop: Theme.hp('5%'),
    paddingHorizontal: Theme.wp('7%'),
  },
  input: {
    width: Theme.wp('86%'),
    height: Theme.hp('6%'),
    borderWidth: 0.7,
    borderColor: Theme.color.helper,
    borderRadius: 18,
    fontSize: Theme.rf(16),
    fontFamily: Theme.font.regular,
    color: Theme.color.text,
    padding: 0,
    paddingLeft: Theme.wp('3%'),
  },
  passView: {
    width: Theme.wp('86%'),
    height: Theme.hp('6%'),
    borderWidth: 0.7,
    borderColor: Theme.color.helper,
    borderRadius: 18,
    flexDirection: 'row',
    alignItems: 'center',
    marginTop: Theme.hp('1%'),
  },
  inputPass: {
    width: Theme.wp('74%'),
    height: Theme.hp('6%'),
    borderRadius: 18,
    fontSize: Theme.rf(16),
    fontFamily: Theme.font.regular,
    color: Theme.color.text,
    padding: 0,
    paddingLeft: Theme.wp('3%'),
  },
  iconView: {
    width: Theme.wp('12%'),
    height: Theme.hp('6%'),
    borderRadius: 18,
    justifyContent: 'center',
    alignItems: 'center',
  },
  forgotPass: {
    fontSize: Theme.rf(14),
    fontFamily: Theme.font.itlaic,
    color: Theme.color.error,
    textAlign: 'right',
  },
  button: {
    width: Theme.wp('86%'),
    height: Theme.hp('6%'),
    borderRadius: 18,
    flexDirection: 'row',
    justifyContent: 'center',
    alignItems: 'center',
    backgroundColor: Theme.color.primry,
    marginTop: Theme.hp('5%'),
  },
  label: {
    fontSize: Theme.rf(16),
    fontFamily: Theme.font.bold,
    color: Theme.color.white,
    marginLeft: Theme.wp('2%'),
  },
  noAccount: {
    fontSize: Theme.rf(14),
    fontFamily: Theme.font.regular,
    color: Theme.color.text,
    marginVertical: Theme.hp('3.5%'),
    textAlign: 'center',
  },
  create: {
    fontSize: Theme.rf(16),
    fontFamily: Theme.font.regular,
    color: Theme.color.tertiary,
    textDecorationLine: 'underline',
  },
  errorsText: {
    fontSize: Theme.rf(10),
    fontFamily: Theme.font.light,
    color: Theme.color.error,
  },
})

export default styles
In Register.js file paste the following code. For now I'm going to leave the handleRegister empty and we will add the required code after when we will create APIs. So add this code for now and be patient as I'm going to tell you each and everything.
import React, { useState, useRef } from 'react'
import { View, Text, Modal, TouchableOpacity, Alert, Image } from 'react-native'

import { Formik } from 'formik'
import Toast from 'react-native-toast-message'
import { KeyboardAwareScrollView } from 'react-native-keyboard-aware-scrollview'

import styles from './Style'
import { Theme } from '../../utils/Theme'
import { registerForm } from './formHandling'
import FNInput from '../../components/FNInput'
import FNLoader from '../../components/FNLoader'
import FNButton from '../../components/FNButton'

const Register = ({ navigation }) => {
  const [firstName] = useState('')
  const [lastName] = useState('')
  const [email] = useState('')
  const [password] = useState('')
  const [show, setShow] = useState(true)
  const [loading, setLoading] = useState(false)
  const [phone, setPhone] = useState('')
  const [logo] = useState(require('../../assets/images/logo.png'))

  const showToastError = message => {
    Toast.show({
      type: 'error',
      text1: 'Error',
      text2: message,
    })
  }

  const showToastSuccess = message => {
    Toast.show({
      type: 'success',
      text1: 'Success',
      text2: message,
    })
  }

  const handleRegister = async v => {}

  return (
    <KeyboardAwareScrollView showsVerticalScrollIndicator={false}>
      <View style={styles.logoView}>
        <Image
          source={logo}
          style={{ width: '100%', height: '100%' }}
          resizeMode="center"
        />
      </View>

      <Text style={styles.loginText}>Sign Up</Text>
      <Text style={styles.desc}>Buy now, Pay now</Text>

      <View style={styles.body}>
        <Formik
          initialValues={{
            FIRSTNAME: firstName,
            LASTNAME: lastName,
            EMAIL: email,
            PHONE: phone,
            PASSWORD: password,
          }}
          validationSchema={registerForm}
          onSubmit={(v, a) => {
            handleRegister(v)
          }}
        >
          {props => (
            <>
              <FNInput
                placeholder="first name"
                placeholderTextColor={Theme.color.text}
                style={styles.input}
                value={props.values.FIRSTNAME}
                onChangeText={props.handleChange('FIRSTNAME')}
              />
              <Text
                style={{ ...styles.errorsText, marginBottom: Theme.hp('1%') }}
              >
                {props.touched.FIRSTNAME && props.errors.FIRSTNAME}
              </Text>
              <FNInput
                placeholder="last name"
                placeholderTextColor={Theme.color.text}
                style={styles.input}
                value={props.values.LASTNAME}
                onChangeText={props.handleChange('LASTNAME')}
              />
              <Text
                style={{ ...styles.errorsText, marginBottom: Theme.hp('1%') }}
              >
                {props.touched.LASTNAME && props.errors.LASTNAME}
              </Text>
              <FNInput
                placeholder="Email"
                placeholderTextColor={Theme.color.text}
                style={styles.input}
                keyboardType="email-address"
                value={props.values.EMAIL}
                onChangeText={props.handleChange('EMAIL')}
              />
              <Text style={styles.errorsText}>
                {props.touched.EMAIL && props.errors.EMAIL}
              </Text>

              <FNInput
                placeholder="Phone"
                placeholderTextColor={Theme.color.text}
                style={styles.input}
                keyboardType="numeric"
                value={props.values.PHONE}
                onChangeText={props.handleChange('PHONE')}
              />
              <Text style={styles.errorsText}>
                {props.touched.PHONE && props.errors.PHONE}
              </Text>

              <FNInput
                placeholder="Password"
                placeholderTextColor={Theme.color.text}
                style={styles.input}
                secureTextEntry={show}
                value={props.values.PASSWORD}
                onChangeText={props.handleChange('PASSWORD')}
              />
              <Text style={styles.errorsText}>
                {props.touched.PASSWORD && props.errors.PASSWORD}
              </Text>

              <FNButton
                style={styles.button}
                label="Sign Up"
                icon="sign-in-alt"
                size={20}
                color={Theme.color.white}
                labelStyle={styles.label}
                onPress={props.handleSubmit}
                // onPress={() => handleRegister()}
              />
              <Text style={styles.noAccount}>
                don't have an account?
                <Text
                  style={styles.create}
                  onPress={() => navigation.goBack()}
                >
                  {' '}
                  Create Now
                </Text>
              </Text>
            </>
          )}
        </Formik>
      </View>
      <FNLoader
        visible={loading}
        label="Please wait..."
      />
    </KeyboardAwareScrollView>
  )
}

export default Register
When we have made a UI for registering a user, why we should not add the UI for Login 😉 😉. Paste the below and you are done with it. 🥳🥳🥳
import React, { useState } from 'react'
import { View, Text, Alert, Image } from 'react-native'

import { Formik } from 'formik'
import Toast from 'react-native-toast-message'
import { KeyboardAwareScrollView } from 'react-native-keyboard-aware-scrollview'

import styles from './Style'
import { Theme } from '../../utils/Theme'
import { loginForm } from './formHandling'
import FNInput from '../../components/FNInput'
import FNLoader from '../../components/FNLoader'
import FNButton from '../../components/FNButton'

const Login = ({ navigation }) => {
  const [email] = useState('')
  const [password] = useState('')
  const [show, setShow] = useState(true)
  const [loading, setLoading] = useState(false)
  const [logo] = useState(require('../../assets/images/logo.png'))

  const showToastError = message => {
    Toast.show({
      type: 'error',
      text1: 'Error',
      text2: message,
    })
  }

  const showToastSuccess = message => {
    Toast.show({
      type: 'success',
      text1: 'Success',
      text2: message,
    })
  }

  const doLogin = async v => {

  }

  return (
    <KeyboardAwareScrollView>
      <View style={styles.logoView}>
        <Image
          source={logo}
          style={{ width: '100%', height: '100%', marginLeft: Theme.wp('5%') }}
          resizeMode="cover"
        />
      </View>

      <Text style={styles.loginText}>Login</Text>
      <Text style={styles.desc}>Buy now, Pay now</Text>

      <View style={styles.body}>
        <Formik
          initialValues={{
            EMAIL: email,
            PASSWORD: password,
          }}
          validationSchema={loginForm}
          onSubmit={(v, a) => {
            doLogin(v)
          }}
        >
          {props => (
            <>
              <FNInput
                placeholder="Email"
                placeholderTextColor={Theme.color.text}
                style={styles.input}
                keyboardType="email-address"
                value={props.values.EMAIL}
                onChangeText={props.handleChange('EMAIL')}
              />
              <Text style={styles.errorsText}>
                {props.touched.EMAIL && props.errors.EMAIL}
              </Text>
              <View style={styles.passView}>
                <FNInput
                  placeholder="Password"
                  placeholderTextColor={Theme.color.text}
                  style={styles.inputPass}
                  secureTextEntry={show}
                  value={props.values.PASSWORD}
                  onChangeText={props.handleChange('PASSWORD')}
                />
                <View style={styles.iconView}></View>
              </View>
              <Text style={styles.errorsText}>
                {props.touched.PASSWORD && props.errors.PASSWORD}
              </Text>
              <Text style={styles.forgotPass}>Forgot Password?</Text>
              <FNButton
                style={styles.button}
                label="Login"
                icon="sign-in-alt"
                size={20}
                color={Theme.color.white}
                labelStyle={styles.label}
                onPress={props.handleSubmit}
              />
            </>
          )}
        </Formik>
        <Text style={styles.noAccount}>
          don't have an account?
          <Text
            style={styles.create}
            onPress={() => navigation.navigate('Register')}
          >
            {' '}
            Create Now
          </Text>
        </Text>
      </View>
      <FNLoader
        visible={loading}
        label="Logging In..."
      />
    </KeyboardAwareScrollView>
  )
}

export default Login
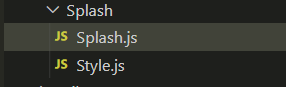
Ohhhhhhh nooo, where is our splash screen???? 😕😕😕😕. Let me find it from you. Please wait!!! First create two files in the splash folder as below
 Yeah, here it is. Don't look at this line. Code is below this line!!
Splash.js
import React, { useEffect } from 'react'
import { View } from 'react-native'

import LottieView from 'lottie-react-native'

import styles from './Style'
import { Theme } from '../../utils/Theme'

const Splash = ({ navigation }) => {
  useEffect(() => {
    setTimeout(() => {
      navigation.navigate('Login')
    }, 100)
  })

  return (
    <View style={styles.main}>
      <LottieView
        source={require('../../assets/jsons/splash.json')}
        autoPlay
        style={{ flex: 1, height: Theme.hp('100%') }}
      />
    </View>
  )
}

export default Splash
And in Style.js
import { StyleSheet } from 'react-native'

import { Theme } from '../../utils/Theme'

const styles = StyleSheet.create({
  main: {
    flex: 1,
    // backgroundColor: Theme.color.white,
  },
  heading: {
    color: Theme.color.tertiary,
    fontSize: Theme.rf(16),
    fontFamily: Theme.font.bold,
  },
})

export default styles
Should we made a register success screen? Yes, so why not you should create two files in this folder like this?
Below are the code for these files 👇👇
import React from 'react'
import { View, Text } from 'react-native'

import LottieView from 'lottie-react-native'

import styles from './Style'

const RegisterSuccess = ({ navigation, route }) => {
  const { name } = route.params

  return (
    <View style={styles.main}>
      <Text style={styles.thanksText}>Welcome {name}.</Text>
      <View style={styles.lottieView}>
        <LottieView
          source={require('../../assets/jsons/success.json')}
          autoPlay
          loop={false}
          style={{ width: '100%', height: '100%' }}
        />
      </View>
      <Text style={styles.thanksText}>
        You have successfully created your account.
      </Text>
      <Text
        style={styles.login}
        onPress={() => navigation.replace('Login')}
      >
        Login
      </Text>
    </View>
  )
}

export default RegisterSuccess
And Style.js
import { StyleSheet } from 'react-native'

import { Theme } from '../../utils/Theme'

const styles = StyleSheet.create({
  main: {
    flex: 1,
    backgroundColor: Theme.color.white,
    justifyContent: 'center',
    alignItems: 'center',
  },
  lottieView: {
    width: Theme.wp('50%'),
    height: Theme.hp('25%'),
  },
  thanksText: {
    color: Theme.color.text,
    fontSize: Theme.rf(16),
    fontFamily: Theme.font.regular,
    textAlign: 'center',
    paddingHorizontal: Theme.wp('5%'),
    lineHeight: Theme.hp('2.9%'),
  },
  login: {
    color: Theme.color.tertiary,
    fontSize: Theme.rf(18),
    fontFamily: Theme.font.medium,
    textDecorationLine: 'underline',
    marginTop: Theme.hp('2%'),
  },
})

export default styles
I know the tutorial is getting longer and longer but I'm sure you will be glad at the end of this tutorial, So here it is our final UI for payment screen. create these files inside Home folder
Home.js
import React from 'react'
import { Text, View, Alert } from 'react-native'

import Toast from 'react-native-toast-message'
import { useStripe } from '@stripe/stripe-react-native'

import styles from './Style'
import { Theme } from '../../utils/Theme'
import FNButton from '../../components/FNButton'

const Home = ({ navigation, route }) => {
  const { id, firstName, lastName, email, phone } = route.params.response
  const [amount, setAmount] = React.useState(0)

  const { initPaymentSheet, presentPaymentSheet } = useStripe()

  const fetchPaymentSheetParams = async () => {
   }

  const initializePaymentSheet = async () => {

  }

  const openPaymentSheet = async () => {

  }

  return (
    <View style={styles.main}>
      <View style={styles.header}>
        <Text style={styles.heading}>Welcome Fiyaz</Text>

        <Text style={styles.desc}>
          This is helping project for developers for implementing payments using
          Stripe in React Native
        </Text>

        <Text style={styles.desc1}>
          You can use test card for this transcation
        </Text>

        <View style={styles.line}>
          <Text style={styles.text1}>Card:</Text>
          <Text style={styles.text2}>4242 42424 4242 4242</Text>
        </View>

        <View style={styles.line}>
          <Text style={styles.text1}>Exp Date:</Text>
          <Text style={styles.text2}>Any valid date after today.</Text>
        </View>
        <View style={styles.line}>
          <Text style={styles.text1}>CVC:</Text>
          <Text style={styles.text2}>any 3 digits.</Text>
        </View>

        <Text
          style={{
            ...styles.desc1,
            marginVertical: 0,
            marginTop: Theme.hp('3%'),
          }}
        >
          For US you can use any 5 digits zip code.
        </Text>
      </View>

      <View style={styles.body}>
        <View style={styles.line1}>
          <FNButton
            style={styles.pay}
            label="100"
            labelStyle={styles.label}
            onPress={() => setAmount(100)}
          />
          <FNButton
            style={{ ...styles.pay, backgroundColor: Theme.color.secondary }}
            label="150"
            labelStyle={styles.label}
            onPress={() => setAmount(150)}
          />
        </View>

        <View style={styles.line1}>
          <FNButton
            style={{ ...styles.pay, backgroundColor: Theme.color.tertiary }}
            label="200"
            labelStyle={styles.label}
            onPress={() => setAmount(200)}
          />
          <FNButton
            style={{ ...styles.pay, backgroundColor: Theme.color.helper }}
            label="250"
            labelStyle={styles.label}
            onPress={() => setAmount(250)}
          />
        </View>

        <FNButton
          style={styles.payBtn}
          label="Pay"
          labelStyle={styles.label}
          onPress={() => initializePaymentSheet()}
        />
      </View>
    </View>
  )
}

export default Home
Style.js
import { StyleSheet } from 'react-native'

import { Theme } from '../../utils/Theme'

const styles = StyleSheet.create({
  main: {
    flex: 1,
  },
  header: {
    flex: 5,
    paddingHorizontal: Theme.wp('10%'),
    backgroundColor: 'rgba(108, 150, 35, 0.8)',
    margin: 5,
    borderRadius: 28,
  },
  body: {
    flex: 5,
    paddingHorizontal: Theme.wp('10%'),
  },
  heading: {
    color: Theme.color.primry,
    fontSize: Theme.rf(17),
    fontWeight: '700',
    marginVertical: Theme.hp(' 3%'),
  },
  desc: {
    color: Theme.color.text,
    fontSize: Theme.rf(14),
    textAlign: 'center',
    fontWeight: '500',
    lineHeight: Theme.hp('2.6%'),
  },
  desc1: {
    color: Theme.color.white,
    fontSize: Theme.rf(14),
    textAlign: 'center',
    fontWeight: '400',
    lineHeight: Theme.hp('2.6%'),
    marginVertical: Theme.hp(' 3%'),
  },
  line: {
    flexDirection: 'row',
    alignItems: 'center',
    marginTop: Theme.hp(' 1%'),
    // justifyContent: 'space-between',
  },
  text1: {
    width: Theme.wp('26%'),
    color: Theme.color.primry,
    fontSize: Theme.rf(16),
    fontWeight: '700',
  },
  text2: {
    color: Theme.color.text,
    fontSize: Theme.rf(16),
    fontWeight: '400',
  },
  line1: {
    flexDirection: 'row',
    alignItems: 'center',
    justifyContent: 'space-between',
    marginTop: Theme.hp('5%'),
  },
  pay: {
    width: Theme.wp('30%'),
    height: Theme.hp('6%'),
    flexDirection: 'row',
    alignItems: 'center',
    justifyContent: 'center',
    backgroundColor: Theme.color.primry,
    borderRadius: 12,
  },
  label: {
    color: Theme.color.white,
    fontSize: Theme.rf(16),
    fontWeight: '400',
  },
  payBtn: {
    width: Theme.wp('60%'),
    height: Theme.hp('6%'),
    flexDirection: 'row',
    alignItems: 'center',
    justifyContent: 'center',
    backgroundColor: Theme.color.primry,
    borderRadius: 12,
    marginTop: Theme.hp('8%'),
    alignSelf: 'center',
  },
})

export default styles
Finally, we have designed our all UIs and now will create navigation part of our screen. So inside navigation folder create a file named as AppStack.js and add the following code inside this file to complete navigation part of our payment mobile application.
import React from 'react'
import { createNativeStackNavigator } from '@react-navigation/native-stack'
import Login from '../screens/Auth/Login'
import Register from '../screens/Auth/Register'
import Splash from '../screens/Splash/Splash'
import RegisterSuccess from '../screens/RegisterSuccess/RegisterSuccess'
import Home from '../screens/Home/Home'

const Stack = createNativeStackNavigator()

export default function AppStack() {
  return (
    <Stack.Navigator
      initialRouteName="Splash"
      screenOptions={{
        headerShown: false,
      }}
    >
      <Stack.Screen
        name="Splash"
        component={Splash}
      />
      <Stack.Screen
        name="Login"
        component={Login}
      />
      <Stack.Screen
        name="Register"
        component={Register}
      />
      <Stack.Screen
        name="RegisterSuccess"
        component={RegisterSuccess}
      />
      <Stack.Screen
        name="Home"
        component={Home}
      />
    </Stack.Navigator>
  )
}
No as we have completed our screens and navigation part, it's mean we are almost done with our UI side and we have to only replace the code of root App.js file with the following code and we are done.
 * Sample React Native App
 * https://github.com/facebook/react-native
 *
 * @format
 * @flow strict-local
 */

import React from 'react'
import { NavigationContainer } from '@react-navigation/native'


import AppStack from './src/navigation/AppStack'

const App = () => {
  return (
      <NavigationContainer>
        <AppStack />
      </NavigationContainer>
  )
}

export default App
We have completed our UI part and if you are tired, take a break and have a cup of coffee☕️☕️
Sripe
Now I will guide you how to create stripe account and obtain keys which we will need to process payments. Stripe is a suite of APIs powering online payment processing and commerce solutions for internet businesses of all sizes. Accept payments and scale faster. You can learn more about stripe at https://stripe.com/
If you do not have stripe account then follow this link to create your stripe account https://dashboard.stripe.com/register. You can skip business registration process as for now we have to do payments in test mode but for live mode you have to complete all registration processes.
After successful registration turn on the test mode from top right corner of your dashboard. https://dashboard.stripe.com/test/dashboard and then click at developers.
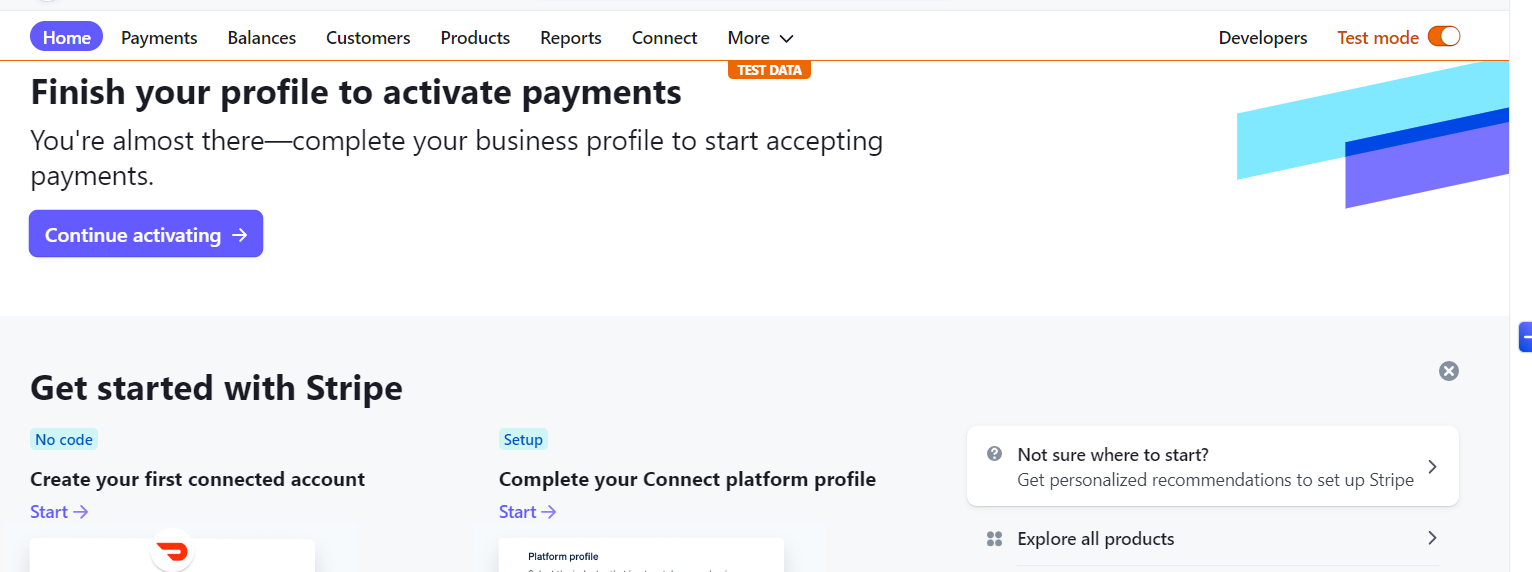
You can find Publishable key and Secret key. We will need Publishable key in our client side(Mobile Application UI) and Secret key in our side code.
Database
We will use mongodb as our database. So if you do not have mongodb account then follow https://account.mongodb.com/account/register to create your new account. After successful registration you will see the dashboard as follow.
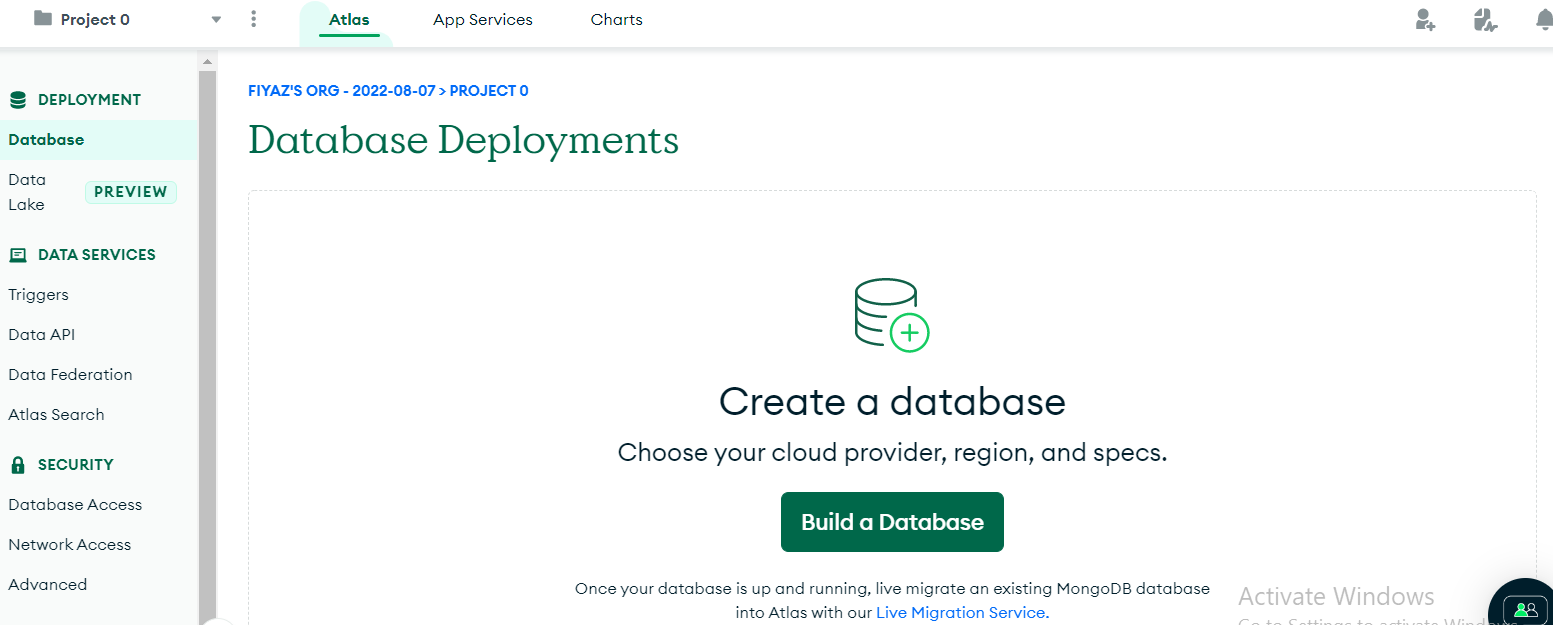
Click on build a database and you will see a new screen as follow. You can create shared database as it is free and will be sufficient for our needs.

At next screen click create cluster button at the bottom of the screen and you will see a new screen. Add your username and password here and save them in a local file as we will need these two when we will connect our backend to database. Don't worry you can also find them in the cluster anytime you want.

Add the bottom of this screen add your machine IP address by clicking Add My Current IP Address. This will enable you to access database by using your this laptop. If you will add 0.0.0.0/0 then you can access database from any laptop. After this we are done with our database setup🥳🥳🥳.
Server Side
We will use NodeJS and express for our side side development. NodeJS is the vital language to connect with mongodb in the modern development world. Without going deep into the details of what NodeJS and express are we move towards our most important part termed as coding😋😋.
create a folder and open command prompt in it. Initialize the project by typing npx init -y and press enter. Install some neccessary packages by using npm.
- bcrypt
- body-parser
- config
- cors
- express
- helmet
- joi
- mongodb
- mongoose
- stripe
Create a file index.js in the root folder and then create a folders config, models and routes at the root of the project folder.
config
Inside folder add two files named as custom-environment-variables.json and default.json as follow.
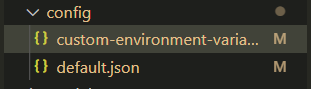
and paste the same in both files
{
  "PrivateKey": "mongodb+srv://username:password@cluster0.zy6jo.mongodb.net/easyPay?retryWrites=true&w=majority",
  "StripeKey": "add your stripe secret key here"
}
Please remember that you need to add your stripe secret key here. https://dashboard.stripe.com/apikeys. In PrivateKey replace username and password with mongodb username and password which we added while creating databse during below screen.

models
Inside this folder create a file named as user.js and add the following code inside this file.
const Joi = require("joi")
const mongoose = require("mongoose")

const userSchema = new mongoose.Schema({
  firstName: {
    type: String,
    required: true,
    minlength: 3,
    maxlength: 35,
  },
  lastName: {
    type: String,
    required: true,
    minlength: 3,
    maxlength: 35,
  },
  email: {
    type: String,
    required: true,
    minlength: 5,
    maxlength: 255,
    unique: true,
  },
  phone: {
    type: String,
    required: true,
    minlength: 10,
    maxlength: 16,
  },
  password: {
    type: String,
    required: true,
    minlength: 8,
    maxlength: 255,
  },
  paid: {
    type: Boolean,
    required: true,
  },
})

const User = mongoose.model("User", userSchema)

function validateUser(user) {
  const schema = Joi.object({
    firstName: Joi.string().min(3).max(35).required(),
    lastName: Joi.string().min(3).max(35).required(),
    email: Joi.string()
      .min(5)
      .max(255)
      .required()
      .email({ minDomainSegments: 2, tlds: { allow: ["com", "net"] } }),
    phone: Joi.string().min(10).max(16).required(),
    password: Joi.string().min(8).max(255).required(),
  })

  return schema.validate(user)
}

exports.User = User
exports.validate = validateUser
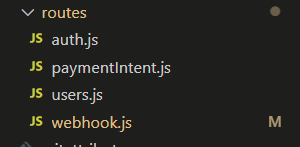
routes
This folder will contain our routes files and we will create APIs inside this folder. Please create four files inside this folder as given below.
In auth.js add the following code and this route will be responsible for logging In our application user. Here is the code for this file.
const Joi = require("joi")
const bcrypt = require("bcrypt")
const express = require("express")

const { User } = require("../models/user")

const router = express.Router()

router.post("/", async (req, res) => {
  //validating request
  const { error } = validate(req.body)

  if (error) {
    return res.status(400).send(error.details[0].message)
  }

  let user = await User.findOne({ email: req.body.email })

  if (!user) {
    return res.status(404).send(`No user found for eamil ${req.body.email}`)
  }

  const validPassword = await bcrypt.compare(req.body.password, user.password)
  if (!validPassword) {
    return res.status(400).send("Please check your password again")
  }

  const data = {
    id: user._id,
    firstName: user.firstName,
    lastName: user.lastName,
    email: user.email,
    phone: user.phone,
    paid: user.paid,
  }

  res.status(200).send(data)
})

function validate(req) {
  const schema = Joi.object({
    email: Joi.string()
      .min(5)
      .max(255)
      .required()
      .email({ minDomainSegments: 2, tlds: { allow: ["com", "net"] } }),
    password: Joi.string().min(8).max(255).required(),
  })

  return schema.validate(req)
}

module.exports = router
This is the code for user.js which is for registering our user
const bcrypt = require("bcrypt")
const express = require("express")

const { User, validate } = require("../models/user")

const router = express.Router()

router.post("/", async (req, res) => {
  //validating request
  const { error } = validate(req.body)

  if (error) {
    return res.status(400).send(error.details[0].message)
  }

  // Check if this user already exisits
  let user = await User.findOne({ email: req.body.email })
  if (user) {
    return res.status(409).send(`Someone is already using ${req.body.email}.`)
  }

  user = new User({
    firstName: req.body.firstName,
    lastName: req.body.lastName,
    email: req.body.email,
    phone: req.body.phone,
    password: req.body.password,
    paid: false,
  })

  const salt = await bcrypt.genSalt(10)
  user.password = await bcrypt.hash(user.password, salt)

  await user.save()

  const data = {
    id: user._id,
    firstName: user.firstName,
    lastName: user.lastName,
    email: user.email,
    phone: user.phone,
    paid: user.paid,
  }

  res.status(200).send(data)
})

module.exports = router
Now we will create API for our most important part of the tutorial which is to create a paymentIntent. As per stripe offical documentation, a PaymentIntent guides you through the process of collecting a payment from your customer. A PaymentIntent transitions through multiple statuses throughout its lifetime as it interfaces with Stripe.js to perform authentication flows and ultimately creates at most one successful charge. You can learn more abour it here https://stripe.com/docs/api/payment_intents
paste this code inside PaymentIntent.js file
const config = require("config")
const express = require("express")

const key = config.get("StripeKey")

const stripe = require("stripe")(key)

const router = express.Router()

router.post("/", async (req, res) => {
  try {
    const paymentIntent = await stripe.paymentIntents.create({
      amount: req.body.amount,
      currency: "usd",
      payment_method_types: ["card"],
      description: req.body.description,
      receipt_email: req.body.receipt_email,
      shipping: {
        address: {
          city: "",
          country: "",
          line1: "",
          line2: "",
          postal_code: "",
          state: "",
        },
        name: req.body.name,
        phone: req.body.phone,
      },
      metadata: {
        uid: req.body.uid,
      },
    })

    res.json({ paymentIntent: paymentIntent.client_secret })
  } catch (error) {
    res.json({ error })
  }
})

module.exports = router
Now we will create webhook to update our database upon successful transcation. It is important to update the databse using webhooks and not by front-end or client side because it can leak performance. Let me share you the reason from stripe officail documentation.
Stripe sends a payment_intent.succeeded event when the payment completes. Listen for these events rather than waiting on a callback from the client. On the client, the customer could close the browser window or quit the app before the callback executes, and malicious clients could manipulate the response. Setting up your integration to listen for asynchronous events is what enables you to accept different types of payment methods with a single integration
Inside webhook.js file paste this code
const config = require("config")
const express = require("express")

const key = config.get("StripeKey")
const stripe = require("stripe")(key)

const { User } = require("../models/user")

const router = express.Router()

router.post(
  "/",
  express.raw({ type: "application/json" }),
  async (req, res) => {
    let event = req.body

    // Handle the event
    switch (event.type) {
      case "payment_intent.succeeded":
        const paymentIntent = event.data.object
        updateUser(paymentIntent.metadata.uid)
        // Then define and call a function to handle the event payment_intent.succeeded
        break

      default:
        console.log(`Unhandled event type ${event.type}`)
    }
    res.send({ received: true })
  }
)

const updateUser = async (id) => {
  const update = { paid: true }
  await User.findByIdAndUpdate(id, update)
}

module.exports = router
Hosting
To host our APIs we will use heroku. Heroku is a cloud platform as a service supporting several programming languages. We need to create file in the root directory named as Procfile and paste the following code in it
web: node index.js
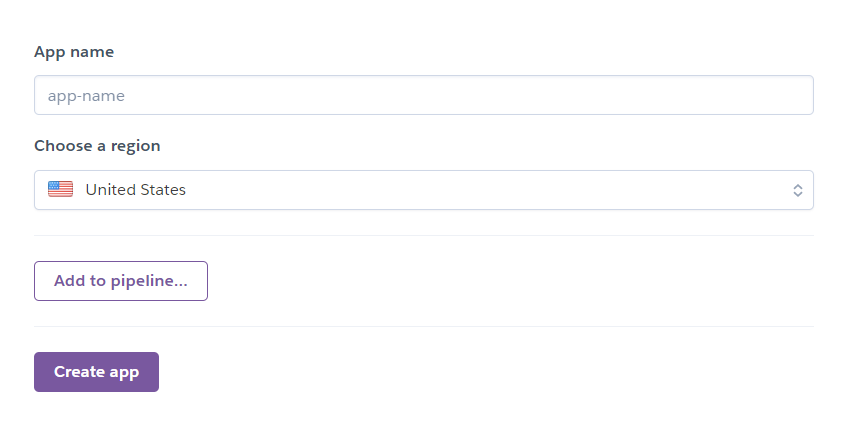
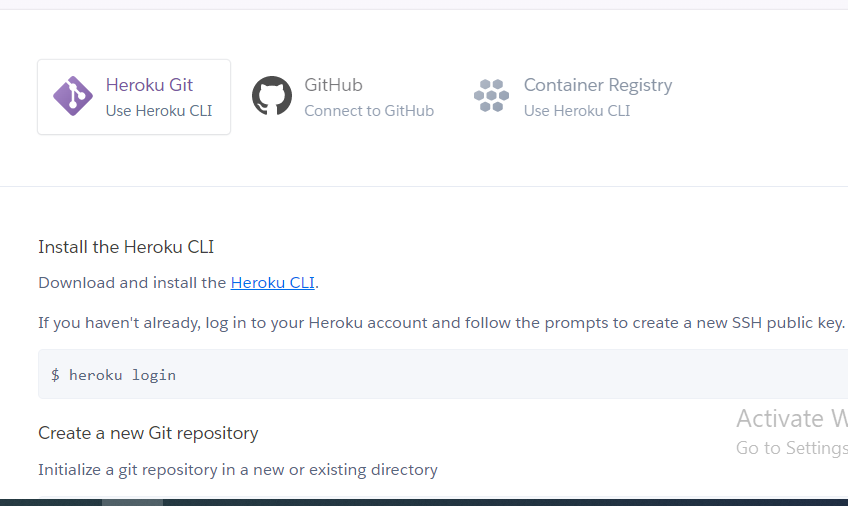
Then go and create your new account https://signup.heroku.com/. After successful login create new app.
After this deploy your app by following heroku git instructions.
 .
.
Envirnoment variables
Now we will create .env and .babelrc file at the root of our react native project
paste this code in .env file this is your heroku base url and stripe publishable key
SERVER_URL=https://your_url/
STRIPE_KEY=pk_test_51KRAUJHyv7k**************************
Paste the following code in .babelrc
{
  "plugins": [["module:react-native-dotenv"]]
}
Update Register.js
Now import this line in the reigster.js
import { SERVER_URL } from '@env' and then update the function handleRegister as follow
  const handleRegister = async v => {
    setLoading(true)
    const url = `${SERVER_URL}api/signUp`
    try {
      const res = await fetch(url, {
        method: 'POST',
        headers: {
          'Content-Type': 'application/json',
        },
        body: JSON.stringify({
          firstName: v.FIRSTNAME,
          lastName: v.LASTNAME,
          email: v.EMAIL,
          phone: v.PHONE,
          password: v.PASSWORD,
        }),
      })

      const resp = await res.text()
      console.log(resp)
      setLoading(false)

      if (res.status == 200) {
        showToastSuccess('Congratulation!')
        setTimeout(() => {
          navigation.replace('RegisterSuccess', {
            name: v.FIRSTNAME,
          })
        }, 1200)
      } else {
        showToastError(resp)
      }
    } catch (error) {
      Alert.alert('Error', error.message)
      console.log(error)
      setLoading(false)
    }
  }
Update Login.js
Now in Login.js update the function as follow
  const doLogin = async v => {
    setLoading(true)
    const url = `${SERVER_URL}api/login`
    try {
      const res = await fetch(url, {
        method: 'POST',
        headers: {
          'Content-Type': 'application/json',
        },
        body: JSON.stringify({
          email: v.EMAIL,
          password: v.PASSWORD,
        }),
      })

      setLoading(false)

      if (res.status == 200) {
        const response = await res.json()
        showToastSuccess('Login successfull')
        navigation.replace('Home', {
          response,
        })
        // navigation.reset({
        //   index: 0,
        //   routes: [{ name: 'Home' }, { params: response }],
        // })
      } else {
        const resp = await res.text()
        showToastError(resp)
      }
    } catch (error) {
      console.log(error)
      setLoading(false)
      Alert.alert('Error', error.message)
    }
  }
Update Home.js
In Home.js now update these functions as follow
  const fetchPaymentSheetParams = async () => {
    let url = `${SERVER_URL}api/paymentIntent`
    try {
      const res = await fetch(url, {
        method: 'POST',
        headers: {
          'Content-Type': 'application/json',
        },
        body: JSON.stringify({
          amount: amount * 100,
          description:
            'This is test payment done by Fiyaz for his helping blog for developers',
          receipt_email: email,
          name: `${firstName} ${lastName}`,
          phone: phone,
          uid: id,
        }),
      })
      if (res.status === 200) {
        const response = await res.json()
        console.log(response)
        if (response.error) {
          Alert.alert(
            `${response.error.statusCode}`,
            response.error.raw.message,
          )
        } else {
          const { paymentIntent } = response
          return { paymentIntent }
        }
      }
    } catch (error) {
      Alert.alert('Error', error.message)
    }
  }

  const initializePaymentSheet = async () => {
    if (amount > 0) {
      const { paymentIntent } = await fetchPaymentSheetParams()
      const { error } = await initPaymentSheet({
        paymentIntentClientSecret: paymentIntent,
        merchantDisplayName: 'Fiyaz Hussain',
      })

      if (error) {
        const message = error.message
        Toast.show({
          type: 'error',
          text1: 'Error',
          text2: `${message}`,
        })
        return
      }

      openPaymentSheet()
    } else {
      Toast.show({
        type: 'info',
        text1: 'Add Amount',
        text2: 'Please select any payment to process',
      })
    }
  }

  const openPaymentSheet = async () => {
    const { error } = await presentPaymentSheet()
    if (error) {
      if (error.message === 'Canceled') {
        return null
      } else {
        Toast.show({
          type: 'error',
          text1: 'Error',
          text2: `${error.message}`,
        })
        return
      }
    }

    Toast.show({
      type: 'success',
      text1: 'Success',
      text2: 'Thank you! You have paid successfully.',
    })
  }
Now we have completed our tutorial and we can now do payments successfully. In this tutorial we learned how to do real time payments in react native application using stripe.
Github
click here to find code https://github.com/Fiyaz6772/payments


